How to choose a pull-up bar
Mounting type decides everything else
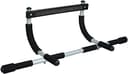
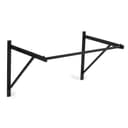
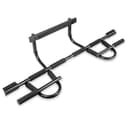
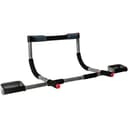
Leverage doorway bars(the Iron Gym, Perfect Fitness) hook over the trim and brace against the wall above the frame — your bodyweight is what holds them there. No screws, no holes, up in seconds. Slip-in doorway bars (ProsourceFit) work the same way with a simpler frame. Wall-mounted bars bolt into studs and behave like gym equipment: higher capacity, more clearance, and permanent.
Renters should stop at doorway bars. Owners who plan to add a weight belt, hang rings, or do anything with momentum should go straight to a wall mount — every doorway bar here is rated 300 lb, and that figure has to cover you plus anything you are holding.
Check your door frame before you order
This is where most returns come from. Measure the inside width of the door opening and the depth of the trim. The bars here fit different ranges: 24–32 in for the Iron Gym, 24–36 in for the ProsourceFit, up to 33 in wide and 6 in deep for the Perfect Fitness. Also look at what is above the door: leverage bars need a flat run of wall above the frame to brace against. Decorative molding, a very narrow header, or a sliding door all rule the type out.
Grips: more is not automatically better
Three well-placed grips cover the movements almost anyone needs — wide for lats, close for arms, neutral (palms facing) for shoulders that dislike the other two. Twelve grips look impressive on a listing and mostly add width. What genuinely matters is whether a neutral grip exists, because that is the position most people with cranky shoulders end up living in.
The door frame damage question
Leverage bars press hard on the trim above the door. On solid wood trim, nothing happens. On soft paint or MDF, you can get marks or compression. The Perfect Fitness frame guard exists precisely for this, which is a real reason to pay more if you care about the paintwork or your deposit. A folded towel between bar and trim is the free version and works better than people expect.
Wall-mounted: when it is worth the holes
Three things push you past a doorway bar. First, capacity: 500 lb versus 300 lb matters the moment you add a weight belt, or if you are a heavier lifter to begin with. Second, clearance: 34 in of bracket depth means you can pull without your knees or head meeting the wall, and it makes knees-to-elbows and kipping possible at all. Third, anchoring: a fixed 32 mm bar bolted into studs is what you hang rings, a suspension trainer or a heavy bag from — which turns one purchase into a whole training station.
The install is the price. It bolts into studs, wood stringers or concrete, so you need to find the studs and you need to accept the holes. Note that Titan’s published warranty runs one year and is not transferable beyond the original purchaser who bought direct, which is worth knowing when you are buying through a marketplace listing.
If you cannot do a pull-up yet
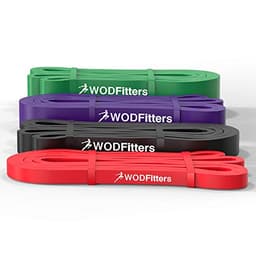
Buy the bar anyway, and buy an assistance band with it. The standard progression is: dead hangs to build grip and shoulder tolerance, then slow lowers from the top (jump up, take five seconds to come down), then band-assisted reps with progressively lighter bands, then your first unassisted rep. That path takes most beginners a few weeks to a few months, and it is the cheapest strength milestone in home training. Rows with resistance bands or dumbbells build the same muscles from the other direction while you get there.
Where a pull-up bar fits in a home gym
If you are building from nothing, the order that wastes the least money is dumbbells first, then a bench, then a pull-up bar — at which point you can train every major pattern: press, pull, squat, hinge and carry. Our home gym build guide lays that sequence out in full, and if you already own a power rack, you have a pull-up bar and this page is redundant — almost every rack includes one.
Two questions come up often enough to have their own pages. The 300 lb doorway rating against the 500 lb wall mount is the decision most buyers are actually making, and doorway vs wall-mounted pull-up bar works through capacity, clearance behind the bar and grip variety in full. And if you are renting, or the trim above your door is the thing you are worried about, will a pull-up bar damage a door frame? explains how a leverage mount loads the moulding and lists the three measurements to take before you order.