How to Use a Foam Roller
Slower, shorter and less heroic than the internet suggests. A practical routine for the six areas worth rolling, how long to spend, and the two places you should never roll.
How this is funded: we earn a commission if you buy through our links, at no extra cost to you. It never changes which product we recommend, and we’ll tell you when we’d skip one. Full disclosure.
What to roll with
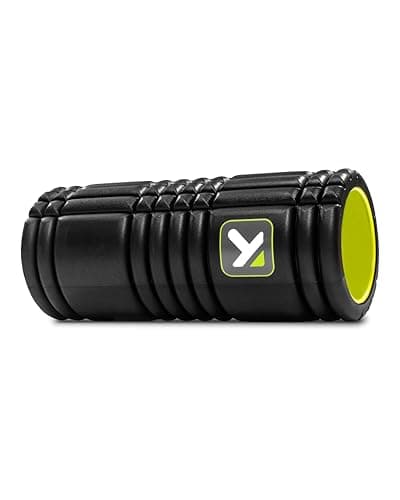
Best all-round roller
TriggerPoint GRID Foam Roller
Almost anyone wanting one durable, do-it-all roller that won't go soft over time.
Full comparisonCheapest way to start
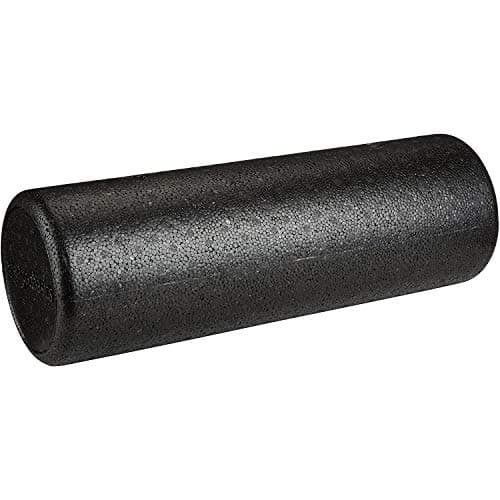
Amazon Basics High-Density Foam Roller
Budget-minded beginners and anyone who prefers a firm, textureless roll.
$17.84 · View on AmazonFull comparisonPrice as of October 13, 2026. #ad How we’re funded
For what a roller bridges over
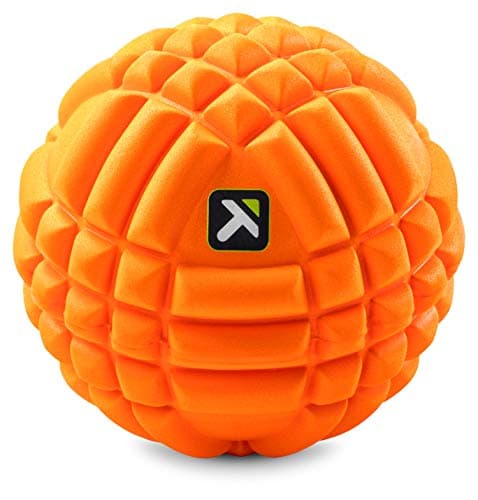
TriggerPoint GRID Ball (5-inch)
Anyone who already rolls and keeps missing glutes, hips, traps and the muscles either side of the spine.
$24.99 · View on AmazonFull comparisonPrice as of October 13, 2026. #ad How we’re funded
Most foam rolling goes wrong in the same two ways: too fast, and too heroic. People scrub back and forth at speed, put their entire bodyweight on one point, and finish sore rather than looser. Rolling well is slow, boring and short — roughly an inch per second, a minute or so per area, and about ten minutes in total.
It is also worth being honest about what rolling does. It does not lengthen fascia, break up scar tissue, or flush lactic acid. What it reliably does is reduce how guarded an area feels, make a joint more comfortable to move through range, and give you a low-effort routine that gets you onto the floor and moving. That is a modest claim and a useful one.
The technique in four points
- Control the pressure.Your hands and your free leg are the volume dial. If it is unbearable, take more of your weight off the roller — you can add pressure back over weeks.
- Go slowly. An inch per second, not a sawing motion. Speed feels productive and achieves very little.
- Pause where it complains.Stop on a tender spot for 20–30 seconds and breathe out slowly. Tensing against the pressure defeats the purpose.
- Add movement. While parked on a spot, slowly bend and straighten the nearest joint. Pressure plus movement beats pressure alone.
A six-position routine
1. Calves
Sit with the roller under one calf and the other leg crossed on top for extra pressure. Roll ankle to just below the knee, then turn the leg in and out to catch both sides. Runners tend to find the outer calf the tender one.
2. Hamstrings
Sit with the roller under the back of one thigh, hands behind you. Roll from just above the knee to just below the sit bone. Rotating the leg slightly inward and outward finds different bands of tissue.
3. Quads
Face down, roller under the front of the thighs, forearms on the floor like a plank. Roll from above the knee to the top of the thigh. To add the movement layer, park on a spot and bend the knee to bring your heel toward your backside a few times.
4. Glutes
Sit on the roller with one ankle crossed over the opposite knee, leaning into the hip of the crossed leg. This is where a massage balloften works better than a roller — the tissue is deep and a 5 in roller bridges over most of it.
5. Lats and upper back
Lie on your side with the roller under your armpit and the arm extended overhead, and roll a short range down the side of the ribs. Then roll onto your back with the roller across the upper back, hands supporting your head, and move a few inches at a time — upper back only.
6. Thoracic extension
Not rolling at all: place the roller across your upper back, support your head, and let your ribs drape backward over it for a few slow breaths, then move an inch and repeat. For anyone who sits all day this is the most valuable 90 seconds on this page.
Where not to roll
Skip the lower back. There is no rib cage there to protect the spine, and the muscles you are trying to reach respond better to a ball placed either side of the spine while you lie on the floor. Skip the front of the neck, the knee joint itself, and the front of the shin bone. Avoid any area that is bruised, swollen, numb or recently injured, and stop immediately if you get sharp pain, tingling or pins and needles rather than pressure.
If you are pregnant, have a clotting disorder or take blood thinners, have advanced osteoporosis, or are recovering from surgery, ask a clinician before adding pressure work — this is general information, not medical advice, and we are not a clinic.
Choosing a roller for how you will actually use it
Density decides comfort. A smooth, softer roller is the right starting point for anyone new to this; a textured, firmer roller concentrates pressure and suits people who find smooth rollers too vague. Length decides versatility: a 12–13 in roller is portable and fine for limbs, while a 36 in roller lets you lie along it lengthwise for the thoracic work above. Diameter changes leverage — 5 to 6 in is standard, and a smaller diameter digs in harder.
A roller is also not the only tool. A ball reaches glutes, feet and shoulder blades that a roller bridges over, and a massage gun targets a spot without you having to get on the floor at all. We compare the two approaches in massage gun vs foam roller, and the vibrating middle ground in vibrating vs standard rollers.
When to do it
Before training, keep it brief — 30 seconds per area, then move into dynamic warm-up work. After training, or in the evening, take longer and treat it as winding down. The only rule that matters is consistency: rolling for ten minutes three times a week beats an occasional forty-minute session you dread. And none of it replaces the actual guidance — adults need 150 to 300 minutes of moderate activity a week plus two muscle-strengthening days. Recovery work supports training; it does not substitute for it.
Wellness guidance, not medical advice. Pulse & Plate is written by a fitness enthusiast, not a doctor. Wearable heart-rate, SpO2, ECG and sleep readings are for general wellness, not diagnosis. For a heart concern, a symptom, or before starting a new exercise program, talk to a qualified professional.
Frequently asked questions
How long should you foam roll for?
About 60 to 90 seconds per muscle group, which makes a whole-body session under ten minutes. Longer sessions do not produce more benefit, and grinding on one spot for five minutes is the fastest way to bruise yourself.
Should foam rolling hurt?
It should feel like firm, tolerable pressure — the sort you can breathe through and relax into. Sharp pain, numbness or tingling means move off that spot. If you are gritting your teeth, take weight off the roller by supporting more of yourself with your hands and free leg.
Should I foam roll before or after a workout?
Both work for different reasons. Before training, a brief roll plus dynamic movement can help you move more freely into position. After training, it is more about comfort and winding down. If you only do it once, do it whenever you will actually do it consistently.
Can foam rolling break up scar tissue or cellulite?
No. A roller applies pressure to soft tissue and to the nervous system's tolerance for that pressure; it does not restructure scar tissue or remove fat. What it reliably does is make an area feel less guarded and more comfortable to move, which is a good enough reason to do it.
Where should you not foam roll?
Not directly on the lower back, where there is no rib cage protecting the spine — use a ball on the muscles either side instead. Not on the front of the neck, the knee joint, the front of the shin bone, or any area that is bruised, swollen or recently injured.
Sources
- CDC — Adult Activity: An Overview — CDC on muscle-strengthening 2+ days/week, 8–12 reps, all major muscle groups (accessed July 19, 2026)
- U.S. HHS / ODPHP — Physical Activity Guidelines for Americans (2nd ed.) — Federal guideline: 150–300 min/week moderate aerobic + muscle strengthening 2+ days (accessed July 19, 2026)
Keep reading
Best foam rollers
Densities, textures and lengths compared - including which one suits a beginner.
See the roller picksMassage gun vs foam roller
Which tool suits which job, and why owning both is cheaper than it sounds.
Read the comparisonHow to use a massage gun
The same practical treatment for percussion devices, including where not to use one.
Read the how-toBest recovery tools
The whole recovery kit compared, from rollers and balls to percussion devices.
See the recovery picks